Picture this: I’m standing in my living room, staring at my monstera like it’s some overgrown beast. It started as a scrappy little thing—a friend handed me a cutting in a plastic cup, half-dead and droopy. I nursed it back, and now it’s a leafy monster, spilling over my coffee table like it owns the place. Thing is, I got greedy. One wasn’t enough—I wanted a whole jungle of these split-leaf wonders. That’s when I dove headfirst into propagating monstera, snipping cuttings, fumbling with air layering, and turning my space into a green chaos.
If you’re obsessed with your monstera—or just want more without dropping cash at the plant store—this is for you. I’m no expert; I’m just a guy who’s hacked at stems, drowned a few roots, and somehow ended up with a squad of new plants. We’re talking two killer methods here: cuttings (fast, messy, and my go-to) and air layering (slow, fancy, and weirdly satisfying). I’ll spill how I did it, where I messed up, and how you can grow your own monstera madness. No fancy setup—just me, some scissors, and a lot of “let’s see if this works.” Ready? Let’s make some plant babies!
Why I’m Hooked on Propagating Monstera
Real talk: monsteras are the coolest. Those funky split leaves, that wild vibe—they’re like the rockstars of my plant crew. But they’re pricey—$30 for a tiny one at the shop? Nope. Plus, my big guy was getting leggy, stretching out like it was begging for a trim. Propagating hit me like a lightbulb—you take one plant, chop a piece off, and bam, you’ve got more. It’s free, it’s a rush, and it makes me feel like I’ve cracked some plant-parent code, even when I’m guessing half the time. Cuttings and air layering are my jam—both work, but they’re different beasts. Here’s how I tackled ‘em, mess and all.
Method 1: Cuttings—The Quick-and-Dirty Way
Cuttings are my lazy-day move—fast, simple, and perfect when I can’t wait around. I’ve snipped my monstera a dozen times now, and it’s still thriving, so here’s my sloppy, human guide.
What You’ll Need
- Sharp scissors (I’ve used kitchen ones in a pinch—don’t tell).
- A glass of water or a pot with dirt (I’ve tried both—more on that).
- A monstera with some guts—look for a stem with a node (that bumpy bit where leaves and roots pop out).
- A little patience (not my strong suit, but I manage).
How I Do It
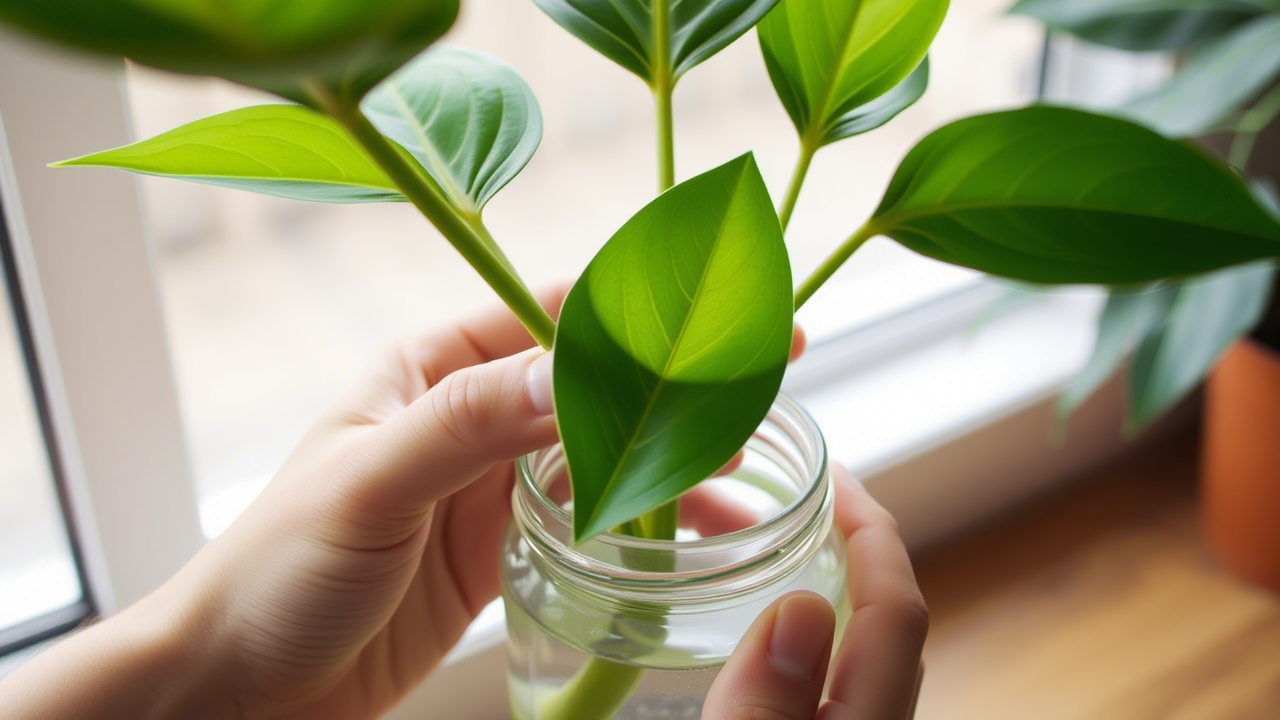
- Find the Spot: I hunt for a stem with at least one node and a leaf—two’s better, but one’ll do. Nodes are key—without ‘em, no roots, no plant. I learned that the hard way.
- Snip It: I grab my scissors, take a deep breath, and cut just below the node—about an inch down. It feels brutal, like I’m betraying my plant, but it’s fine.
- Pick Your Path: Water or soil? I’ve done both. Water’s my fave—stick the cutting in a glass, keep the node submerged, and wait. Soil’s trickier—pot it up, keep it damp, and pray.
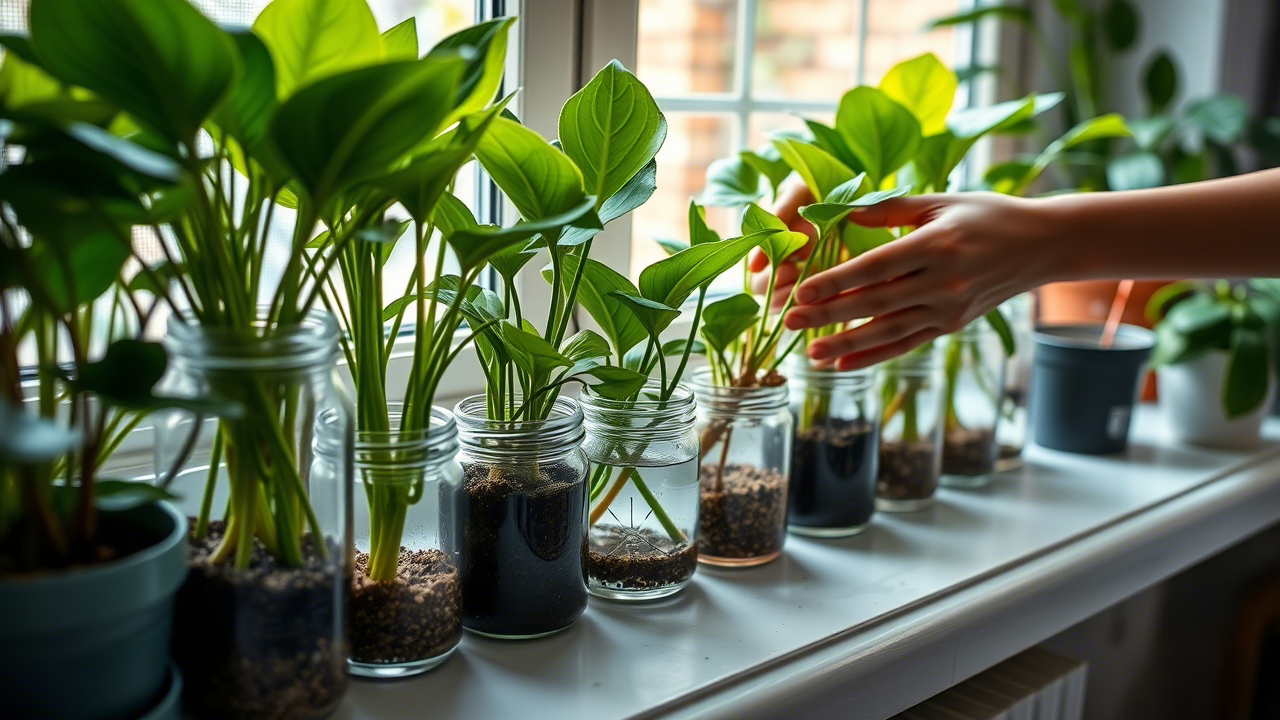
- Wait It Out: Roots show up in water after 2-4 weeks—little white threads that make me cheer. Soil takes longer—maybe 6 weeks—but it’s less fuss once they’re going.
- Plant It: Once roots are an inch or two (water) or I see new growth (soil), I pot it in regular dirt. Done—new monstera!
My Cutting Chaos
First time, I snipped a stem with no node—big oops. It sat in water for a month, doing nothing but mocking me. Lesson learned: nodes or bust. Another time, I left a cutting in water too long—roots got slimy. Now I swap the water every few days, and I’ve got five new plants from cuttings alone. My living room’s a monstera nursery, and I’m not mad about it.
Pro Tips (From My Messes)
- Use clean scissors—dirty ones gave me a funky stem once.
- Indirect light’s your friend—too much sun fries ‘em.
- Don’t overwater in soil—I drowned one early on. Keep it moist, not soggy.
Method 2: Air Layering—The Fancy, Patient Way
Air layering’s my “ooh, I’m a real gardener” move—slower, weirder, but kinda cool. It’s like rooting a cutting while it’s still on the plant, and it’s saved my bacon with tricky stems. Here’s how I fumble through it.
What You’ll Need
- A monstera stem with a node (same deal as cuttings).
- A sharp knife (I’ve used a pocket one—works fine).
- Sphagnum moss (got mine cheap online).
- Plastic wrap or a baggie (I’ve reused grocery ones).
- Twine or twist ties (whatever’s in the junk drawer).
- Water and patience (more than cuttings, ugh).
How I Do It
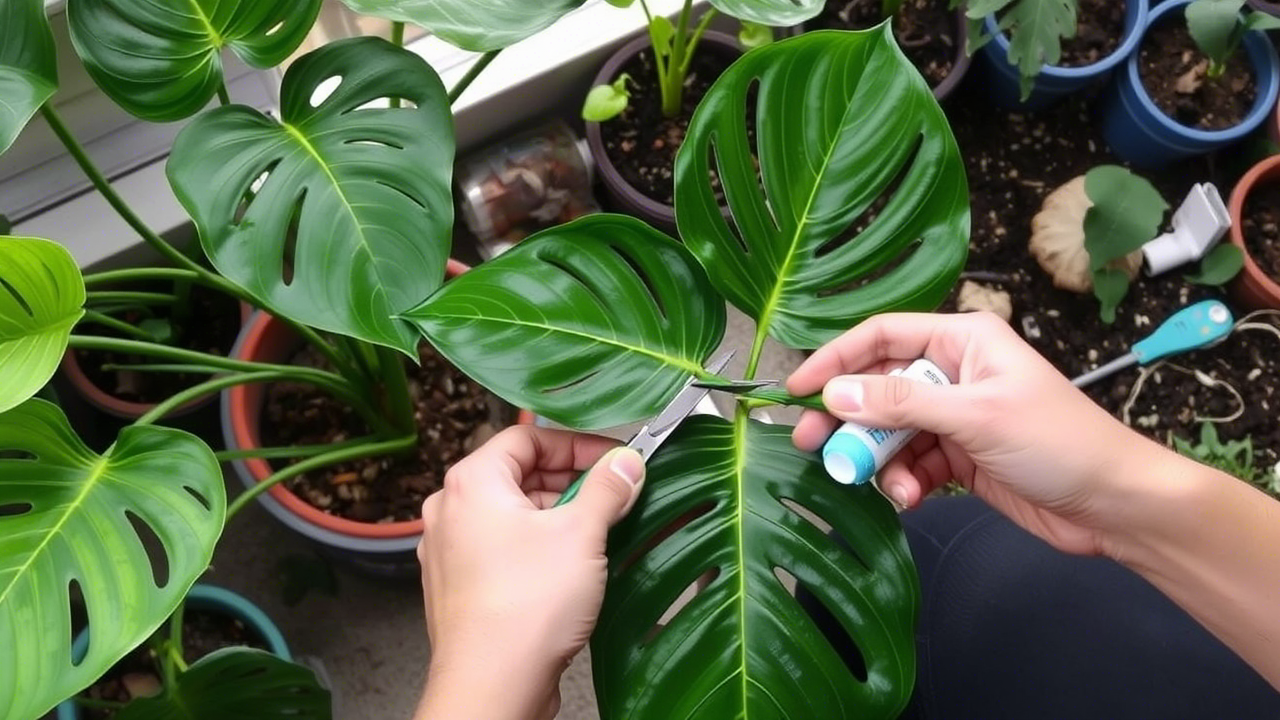
- Pick Your Victim: I find a stem with a node—usually one that’s too long or wonky. It’s gotta stay attached, so I pick something I can reach.
- Make the Cut: I grab my knife and slice into the stem just below the node—about halfway through. Not gonna lie, it feels wrong, like I’m wounding my baby. Sometimes I nick the node a bit to wake it up.
- Moss It Up: I soak some sphagnum moss in water, squeeze it damp, and pack it around the cut. It’s like a wet, green bandage—messy but fun.
- Wrap It Tight: I slap plastic wrap over the moss, sealing it like a burrito. Twine keeps it snug—keeps the moisture in and my sanity intact.
- Wait Forever: Roots take 4-8 weeks to poke through the moss—white little fingers saying “hey, I’m ready.” I check it like a kid on Christmas.
- Cut and Plant: Once roots are beefy (an inch or two), I snip below the moss, peel it off, and pot it in dirt. New plant, no stress!
My Air Layering Adventure
First go, I didn’t wrap it tight enough—moss dried out, no roots. Second time, I overdid the water—mold city. Third time’s the charm—I got a fat root ball after six weeks and potted up a chunky new monstera. It’s thriving by my window now, and I feel like a plant genius (don’t tell anyone I’m not).
Pro Tips (From My Flops)
- Keep the moss damp—check it weekly, add a splash if it’s dry.
- Don’t cut too deep—halfway’s enough, or you’ll snap the stem (yep, did that).
- Indirect light again—sunburn’s real, even mid-propagation.
Cuttings vs. Air Layering: My Take
So, which one’s better? Depends on my mood—and my monstera’s.
- Cuttings: Fast, cheap, and I’ve got new plants in a month. Downside? Riskier—some don’t root, and I’ve lost a few to rot. Perfect when I’m impatient.
- Air Layering: Slower, fancier, but safer—roots grow while it’s still attached, so it’s less “do or die.” Great for big, healthy stems I don’t wanna chop yet.
I lean cuttings—quicker gratification—but air layering’s my backup when I’m feeling extra. Both have turned my one monstera into a takeover crew.
My Dumb Mistakes (Laugh at Me)
- No-Node Nightmare: Cut a stem with no node—sat there dead in water for weeks. Rookie move.
- Rotten Roots: Left a cutting in stale water—turned to mush. Swap it out, folks.
- Moss Mess: Didn’t seal my air layering tight—dried out faster than my patience. Plastic’s gotta hug it.
Growing Your Monstera Madness
Here’s my sloppy survival guide:
- Light: Indirect’s king—too much sun crisps ‘em.
- Water: Damp, not drenched—overwatering’s my nemesis.
- Potting: Loose, well-draining soil—monsteras hate soggy feet.
- Cheer ‘Em On: I talk to mine—dumb, but they grow faster (I swear).
My place is a monstera mess now—cuttings rooting in jars, air-layered babies popping up. It’s chaos, and I love it. Snip a stem, try both ways, and watch your jungle grow. Got a monstera tale—epic win or epic fail? Drop it below—I’m dying to hear! Let’s keep this green madness spreading, one leaf at a time.